Pages

Friday, June 10, 2011

Free Etsy Shop Banners

I've created some free Etsy banners or if you have an artfire shop. 

They've all been saved at 760 X 100 (standard banner size) 

Add your own text, embellishments, or anything else you would like. 

If you do share this anywhere (blog, pinterest, etc) I would really love it if you were to share the love and link to me :)

Right click and choose {save} 

Bee Banner

Blue with Flowers


Cheery


Pink lace with paper roses


Large Daisies with wooden buttons


Metal Butterfly and lines


Pink Buttons


Bubble Gum Flowers


Grid with Buttons


Lace and Polka Flowers


Barn Stars


Rustic Chic


Shabby Sweet


Turquoise and Pink Circles


Gunmetal Rustic


French Blue Postal


Elegant


Blue and Brown


Pink Brown and Lacy


Happy Redesigning!
Emily

Quick Post about SEO :)

Well, this is just a quick post, but I definitely wanted to share. I know alot of us artists have our own websites. Some free through weebly, and others we spend money on. Now I finally have mine up and running, but I still work on it throughout the day. SweetlyScrapped - Now I love having my website and hopefully it turns out to be a wonderful venture, but at the same time, I know I need to  know alot about SEO because I can't afford to have someone worry about that for me. So I read alot and everything I can. Some of it is easy to understand, other information makes me feel really stupid, lol. So I came across this website while browsing at YOLA as an alternative to my weebly website to design my website. So far it seems like one site has what I want, but not the other and then vice versa. I like simple to understand things when it comes to this :)

Anyways, here is the website if you also sell your handmade goodies on a website and are learning about SEO...

SEO Information..... easy to understand.

Happy Reading!
Emily

Wednesday, June 8, 2011

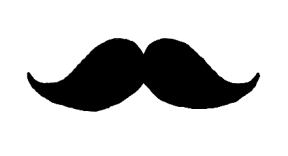
Mustache Digital for Father's Day {{FREEBIE}}

How cute would this be... print out the embellishment, add to a popsicle stick and then "wallah" you have a mustache!!! Get a couple of your kids doing it, take a photo, frame it and you have a cute father's day present!

Or you can resize the image and then add it to your photos as an embellishment. Or you can make cupcake toppers for Father's Day .


Happy Scrapping, Crafting & Rubberstamping!!! 


Tuesday, June 7, 2011

Vintage Inspired Scalloped Circle Embellies


I love simple little embellishments like this to have on hand. I will use them for so many things. I will either add twine to create a tag and a label. Also, I'll use them for scrapbooking as a small journaling area or for my cardmaking for a base. Add a sticker or other small image to the center and you have a sweet embellishment. 

First, punch your scalloped circle base. 
Then you will cut a circle a bit smaller
Then adhere the circle to the scalloped circle
Hand age the edges
Punch a hole at the top
and then tie on your organdy ribbon

Sometimes it's the smallest little things that make the most impact. 

If you would like to see the etsy listing, you can do so here

Happy Scrapping, Stamping and Cardmaking :)
Emily 

Monday, June 6, 2011

25 Scrapbooking Tips

25 Scrapbooking Tips

1. You can create your own custom die cuts by cutting out images such as hearts, flowers and more from packaging. If they are too thin, I always attach to a thicker cardboard and use this for effect. 

2. Want a great background? Cut a patterned paper into a shape and place it onto the background. Use anything around you if you would like to help you make the shape. Alot of times I will grab a plate to make a circle for example. But you can use cups, bowls, etc. 

3. Take an envelope and decorate it. Use this to tuck journaling into. Tags, letters and more. 

4. Tie ribbon around your photos (or string, etc.)

5. Have fun and mix up your fonts.

6. Use brads to hold down ribbons instead of double sided tape or glue dots.

7. To create a pretty border, punch holes and then weave your ribbon or lace through.

8. Remember, buttons look beautiful as flower centers! And you can find extras on your old shirts at the bottom! 

9. Want a pretty title? Cut out your letters from a coordinating paper. If you use a stencil, do it on the back and make sure your stencil is upside down.

10. Need a particular kind of print paper? Make it. Take plain white cardstock and find the rubber stamps that you need for the look. Layer them, overlap them, use different coordinating colors for your page, etc. 

11. Don't have any ribbon? cut a strip of patterned paper and use as a faux ribbon. Another thing you can do is crinkle it and then open it back up to give it texture. 

12. Need some quick texture? Tear it!!! 

13. Have a black and white photo that you would like to make "pop"? Use a marker to add detail and color to the areas that you would like. Don't over do it though. 

14. Create a binder to keep all your ideas and inspiration. Sometimes you just don't want to keep running back and forth to your PC to check on an idea. 
15. Don't know what to journal or what to write? Think of a song lyric, poem or quote and apply to page. I started a little book years ago (MANY years ago) of quotes just because I LOVE them :) 

16. Stumped for titles? Look around.... You'd be surprised how some things can trigger a thought or idea. 

17. Having a hard time remembering the dates of your photos? Well, on your pc, you can right click on your digital camera's image file and then you click on properties. It will then show you when it was taken. I've used this a few different times, lol

18. Want flowers but not spend alot of money? Head to the dollar store and check out the "bunches" of flowers. They're only $1.00 and you can get quite a bit of flowers! Especially the littler ones. 

19. Use a panoramic photo as a border on your layout. 

20. Scrapbooking your kids? or grandkids? Let your kids do the journaling. It will be adorable years later to look back and read. 

21. Have vacation photos? Photocopy your passport for background papers and embellishments. 

22. Don't forget to include the real you photos. The ones of you not knowing, posing, or getting ready. Scrapbooks are a reflection of ourselves. 

23. They have clear scrapbooking paint and lacquer. If not this, you can also use af, lf glue and apply a thin layer to "water" etc. to give it a realistic look. 

24. Take your scalloped scissors, cut different sized circles, crumple up and open them, and then layer them by size. Add a brad in the center, ink the edges and you have a totally neat little flower.

25. As soon as you have your photos developed, write on the back of them. This way if it takes you months before you get to scrapbook them, all your info is already on them and you won't have to try and "remember." 

Scrapbook Album to go please!

Where we live, in upstate NY, we have the Great Escape Amusement Park in Lake George. I have odds and ends from the summers from having season passes. First our season passes, ticket stubs from the games, etc. With my "nature" I love pictures, saving little momentos and more. What did I do with all these little things? Well, a while back, I started a ring (yes, the style that opens and closes, used for scrapbooking) album for something else. I decided that this would be great for our great escape trips. So with our last years season passes, I punched holes, and added them to the ring binder. I then saved little momentos, the map of the park and other such things. I punched holes in everything and then added them to the ring. I upcycled a piece of cardboard for the front and back, for security and stability and then scrapbooked a photo onto the front of the album. I like this idea, because with the upcoming year, I am sure that we'll have more and they'll be easy to add to our album. I was going to upload photos tonight, but blogger is having upload problems. They assure us that they'll be fixed soon, so I will follow up with photos :D 

Happy Scrapping!!!
Emily

Sunday, June 5, 2011

Sunday means coupons!!! AC Moore and Hobby Lobby

Weekly roundup of coupons! YAYE! 


And here are some neat things that I have come across....


There is a DIY tutorial here and she even has a PDF to print out to create it


She has a great idea for scrap leftovers! And how to make your own stamps HERE. I am definitely going to try making my own stamps and I have some great ideas too! If you do, comment & share!!!! 


dish_teal

How to make this clay dish.... and yes, it involves a rubber stamp!!! LOVE this!!! HERE
Happy Sunday, Crafting, Scrapping and Rubberstamping, 
Emily