Well, I LOVE winter. I LOVE making snow scenes (you'll see, lol). I love adding a touch of sparkle and glitter to my snow and projects. I decided to make a few tags for the shop last night with some snow. I tried this heat technique with a few different glitters. What you will end up needing to make these are:
-- Light blue cardstock, cut into tags, 2 inches by 3 inches
-- Heat embossing tool...
-- FINE glitter
-- White ink (pigment ink works best because it stays wet long)
-- Stamps
-- Anything else you'd like to detail these with
Okay, onto the tutorial....
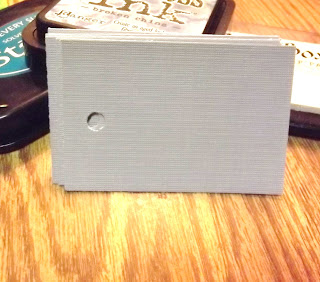
First I cut my tags into 2 x 3 rectangles and punched holes, so that way I knew what space I had to work with....
Then I got my white ink out. I like this colorbox one because it is a pigment ink (stays wet for a long time after it's been put on.... You'll see it on my table! haha)....
Then I inked the bottom, got it nice and wet with the white ink....
Here's a little bit of a "close up"....
Then add your glitter to the wet ink. ALSO -I got too excited to add the glitter that I didn't even put anything underneath it! I was like "Ooooooh mannnnnnnn" afterwards, lol.... You'll see I fixed this later on in the photos, lol
USE VERY FINE GLITTER FOR THIS!!!!!!!!! I tried other glitters.... they didn't work so well :(
See, I added paper underneath! lol.
***Now you will apply your heat tool till the glitter doesn't come off! I would show you, but I only have two hands, lol****
I tried this vintage glitter, thinking I could get it to melt being plastic..... NOPE! lol.
Then I tried this glitter.... ya' know this stuff, from AC moore :D
It looks nice with it being "fluffy"or "chunky", but it doesn't stick with the ink.... I'd stick to glue and glitter for this one, lol!
Here's another angle....
This is the vintage glitter.... I figured it would work, but it didn't....
When you apply the heat tool, it would actually "straighten" out and look bad, lol :(
See, it looks like a shag rug! lol
So we are sticking with the fine glitter for shimmer...
I then stamped a little candy house and a snowman outside waving!
I then decided I wanted to add a little glitter to the top of the house, like snow :)
This one I used glue and glitter though :) I thought this would look better than the fine glitter for dimension....
Here's another angle...
I then inked the top edges in blue too! To give it like a sky appearance.....
Profile view of the tag with the glitter on the chimney and roof...
And here's my tag... not quite sure what kind of ribbon or twine I want to use yet :)


3 comments:
Fantastic tutorial, thanks so much. Lee x
Very cute!
Adorable!!!
Post a Comment